I’ve always struggled with citations: remembering where I should put commas, how to format journal names, how many authors I should list before writing et al (or was it et. al.?). Last year, my roommate caught me using my freshman year copy of A Pocket Style Manual as I complained my way through the tedious formatting of my junior paper citations.

“You don’t use Mendeley?” she asked me. “Oh, wow. Let me help you.”
After saving many tedious hours with the help of a citation manager, I’m passing my roommate’s wisdom on, by way of a 12-minute guide that can get you started using Mendeley. If your experience is anything like mine, you’ll never go back!
Mendeley and Zotero, the two most popular free citation management programs, store sources and create formatted in-text citations, footnotes, and bibliographies. I use Mendeley, which has the benefit of allowing you to highlight and annotate PDFs within its desktop app. But I also have friends who swear by Zotero, which is better with non-PDF sources. (If you’re torn, you can check out this helpful comparison.)
Both programs are extremely easy to use once you’ve started – it’s making the switch that takes some effort. But fear not! In (approximately) 12 minutes you can be on your way. (For Zotero instead, you can try the online guide here, or attend a free training session in Firestone.)
- Create an account. Just enter your basic information and a password. When you’re done, your account homepage will prompt you to download Mendeley.
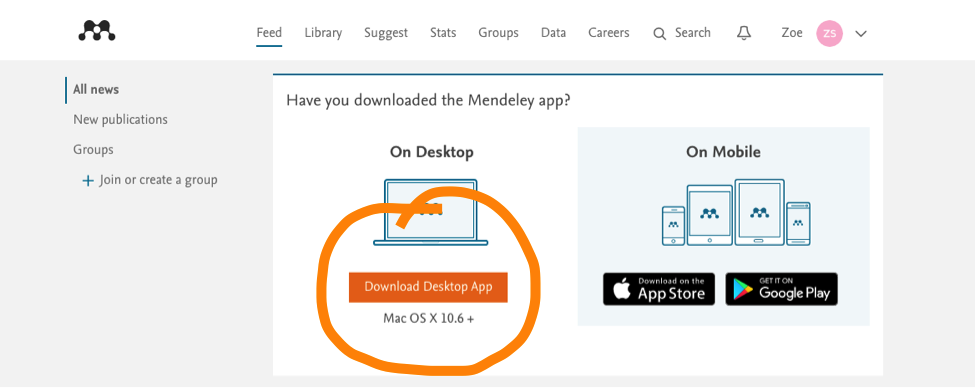
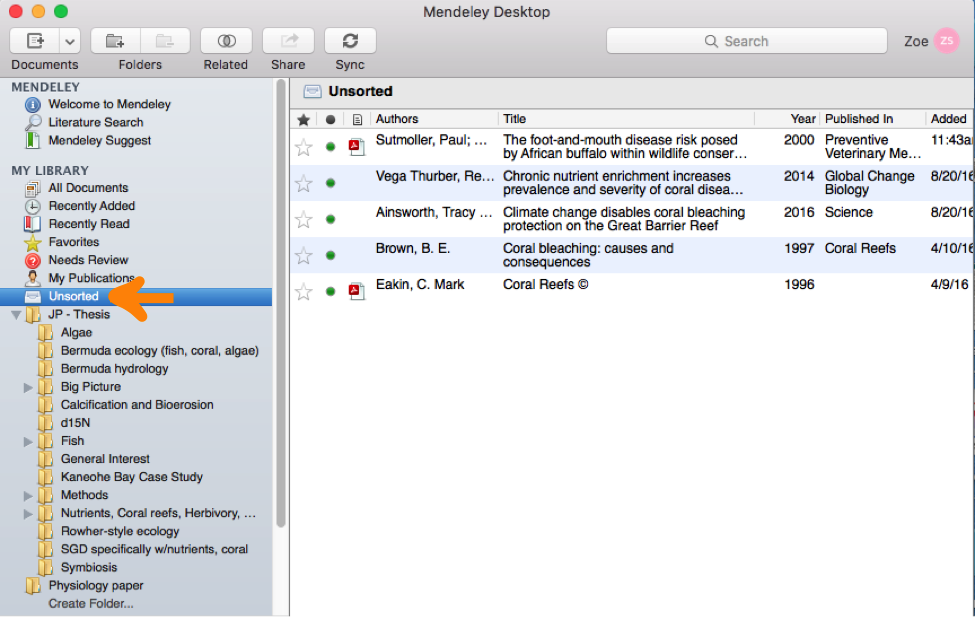
2. Download the desktop app. Installation starts automatically and took me under four minutes. When it’s finished, you can drag sources you have saved on your computer into the app, and organize your sources into folders.
3. Download the web browser extension. When you’re researching and find an article you want, you’ll just click on the Mendeley icon in your browser and save the article to your citations. Mendeley can also download the full-text PDF to your desktop manager.
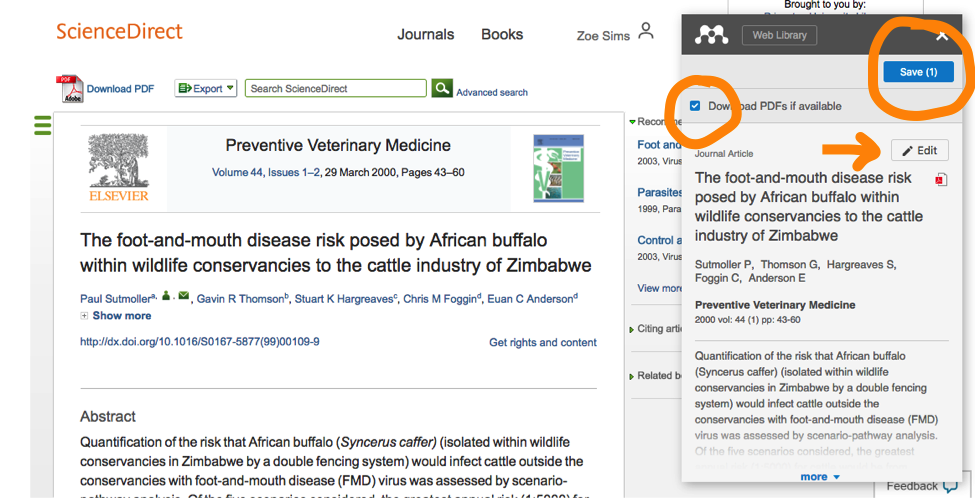
Mendeley automatically extracts citation information from most sources. But if you notice any errors, use the “Edit” button to revise the citation. I’ve found this is sometimes necessary with older (pre-Internet-era) articles, especially those that aren’t often cited by researchers.
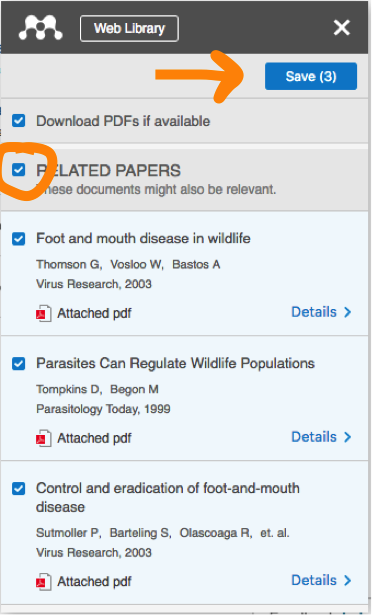
If you scroll down in the Mendeley browser window, you’ll see a list of similar sources, and you can save any or all of these citations and full-text articles with one click. These will all automatically show up in the “Unsorted” folder of the desktop app.
4. You’ve saved the best part for last: download the Word plugin. From your Mendeley Desktop app, go to Tools > Install MS Word Plugin. If you don’t see the toolbar in Word after it’s installed, go to View > Toolbars > Mendeley Toolbar to bring it up.

You can use the toolbar to insert in-text citations from the sources in your Mendeley library. When you’re done writing, just click “Insert Bibliography,” and the plugin will create a formatted bibliography for you, using all the sources you’ve cited in the text.
You’re all set! Enjoy hassle-free citations, and look back, like me, with some astonishment on the days when you used the Pocket Style Manual to write citations. You can also explore some of Mendeley’s advanced features.
Happy writing, happy citing!
— Zoe Sims, Natural Sciences Correspondent
